Best KitchenAid stand mixer attachments
KitchenAid Stand Mixer Attachment Review Pasta Meat: 7 Best Options for Every Home Chef
When it comes to versatile kitchen equipment, a KitchenAid stand mixer attachment review pasta meat comparison reveals why these powerful machines have become staples in modern kitchens. Whether you’re a passionate home baker, an enthusiastic pasta maker, or someone who loves preparing homemade ground meats, understanding the different attachments available for your KitchenAid stand mixer can transform your cooking experience. These attachments extend far beyond basic mixing, offering specialized capabilities that save time, improve consistency, and unlock creative culinary possibilities you never thought possible with a single machine.
Table of Contents
- Why KitchenAid Stand Mixer Attachment Review Pasta Meat Matters
- Step-by-Step KitchenAid Stand Mixer Attachment Review Pasta Meat Guide
- Best KitchenAid Stand Mixer Attachment Review Pasta Meat Options
- Pro Tips for KitchenAid Stand Mixer Attachment Review Pasta Meat
- Common Mistakes to Avoid
- Key Takeaways
- Frequently Asked Questions about KitchenAid Stand Mixer Attachment Review Pasta Meat
- Conclusion
Why KitchenAid Stand Mixer Attachment Review Pasta Meat Matters
The significance of choosing the right KitchenAid stand mixer attachments cannot be overstated for any serious home cook. These specially designed tools maximize the functionality of your stand mixer, transforming it from a simple mixing device into a multi-purpose culinary workstation. With the proper attachments, you can accomplish tasks that would otherwise require purchasing separate, expensive equipment.
Understanding the different attachment types is crucial because each serves a distinct purpose with unique benefits. The pasta maker attachment allows you to create restaurant-quality fresh pasta at home without investing in a dedicated pasta machine costing several hundred dollars. The meat grinder attachment provides superior control over grinding consistency, letting you create custom meat blends for burgers, sausages, and specialty dishes that store-bought ground meat simply cannot match.
Time efficiency represents another critical advantage of having quality attachments. Rather than spending hours kneading dough by hand or struggling with manual pasta rollers, you can accomplish these tasks in minutes with consistent, professional results. For busy families or anyone regularly preparing homemade meals, this time-saving aspect translates directly into more quality time and less kitchen stress.
Beyond convenience, these attachments offer superior results in texture and consistency. The stand mixer’s powerful motor and precise engineering ensure even mixing, thorough kneading, and uniform grinding that manual methods struggle to achieve. Additionally, having all these capabilities in one device means less counter clutter and easier storage compared to maintaining multiple single-purpose appliances.

Step-by-Step KitchenAid Stand Mixer Attachment Review Pasta Meat Guide
Getting Started with Your Attachments
Before using any KitchenAid stand mixer attachment, familiarize yourself with your mixer’s specific model and capacity. Different KitchenAid models—whether the professional 6-quart, commercial 8-quart, or home-use 5-quart versions—may have slightly different attachment configurations and compatibility. Always consult your user manual to understand power levels, bowl capacities, and specific instructions for each attachment you plan to use.
Installing Your Attachments Correctly
Begin by ensuring your stand mixer is unplugged and turned off before attaching or removing any components. Most KitchenAid attachments feature a coil that slides onto the power hub, located at the bottom center of the mixer bowl. Gently push the attachment straight in until it seats fully; you should hear or feel a slight click indicating proper installation. Never force attachments, as this can damage both the hub and the attachment itself.
Removing attachments requires the same care and attention. With the mixer off and unplugged, hold the mixer bowl steady with one hand while gently twisting and pulling the attachment away from the hub. Avoid jerking or applying excessive force, as this can bend or crack the delicate components.
Using the Flat Mixing Paddle
The flat mixing paddle, which comes with every KitchenAid stand mixer, works best for general mixing tasks like creaming butter and sugar, blending wet ingredients, and mixing cake batters. Start at speed 2 or 3 to prevent ingredient splashing, then gradually increase to your desired speed once ingredients are combined.
Operating the Dough Hook
The dough hook attachment is essential for bread making and pizza dough preparation. Begin mixing your dough at speed 1 to incorporate dry ingredients with liquids, then increase to speed 2 for approximately 5-8 minutes until the dough becomes smooth and elastic. The dough hook eliminates the need for hand-kneading, producing superior gluten development.
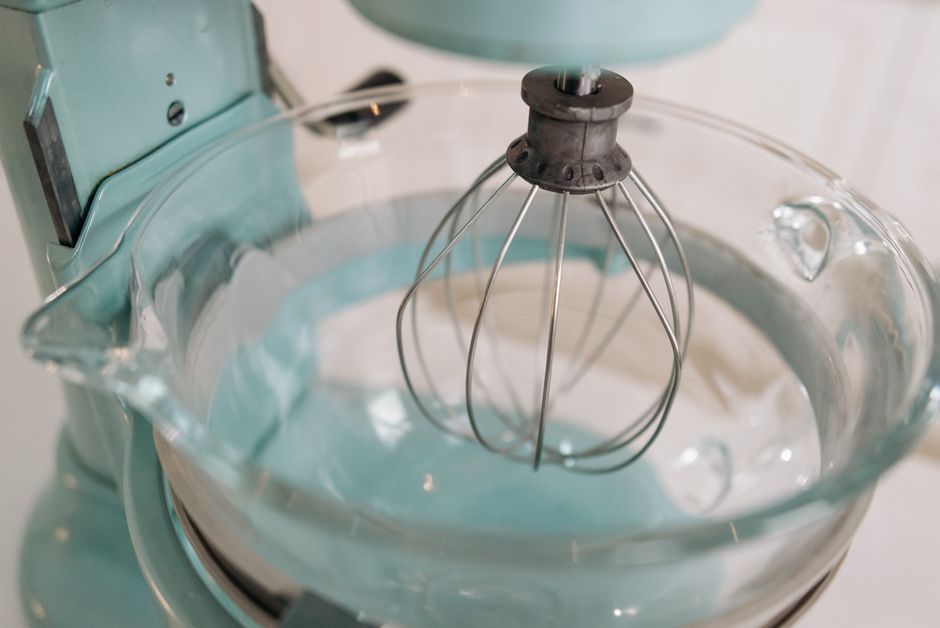
Mastering the Wire Whip
The wire whip attachment aerates ingredients, making it perfect for whipping cream, beating egg whites, and mixing light batters. Always start at lower speeds to prevent ingredient splashing, gradually increasing speed as you achieve desired consistency. This attachment can whip egg whites to stiff peaks in just 3-4 minutes, a task that takes 10 minutes or more by hand.
Best KitchenAid Stand Mixer Attachment Review Pasta Meat Options
1. Pasta Maker Attachment
The pasta maker attachment is a game-changer for fresh pasta enthusiasts. This attachment typically includes both a pasta roller and a cutting attachment for fettuccine or spaghetti. Simply prepare your dough using the dough hook, then feed small portions through the roller, gradually reducing thickness with each pass until you achieve perfect thinness. The cutting attachment then divides your sheets into uniform noodles.
This attachment works with both traditional egg pasta and gluten-free varieties, though gluten-free dough requires slightly more care. The ability to create fresh pasta shapes—from lasagna sheets to pappardelle—opens up entirely new cooking possibilities. You can make enough fresh pasta to serve 4-6 people in under 20 minutes once you master the technique.
2. Food Grinder Attachment (Meat Grinder)
The food grinder attachment transforms your stand mixer into a dedicated meat grinding station. This attachment comes with different grinding plates—typically coarse and fine—allowing you to create custom meat blends suited to your specific recipes. Coarse grinding works perfectly for chunky hamburger patties, while fine grinding creates smooth sausage-like textures ideal for meatballs or specialty preparations.
The meat grinder attachment provides superior hygiene compared to manual grinding since you can easily clean all components. It grinds without generating excess heat, preserving meat quality and food safety. Professional chefs appreciate the consistency and control this attachment offers, and home cooks love how it eliminates the need for expensive, space-consuming dedicated grinders.
3. Vegetable Sheet Cutter Attachment
This specialized attachment slices vegetables into uniform ribbons, thin sheets, or noodle-like strands. It’s perfect for creating vegetable-based pasta alternatives like zucchini noodles or sweet potato ribbons. The attachment produces consistent thickness throughout, preventing over-cooked edges and raw centers that manual slicing often creates.
The vegetable sheet cutter saves significant prep time and produces restaurant-quality results. Whether you’re making vegetable lasagna layers, preparing garnishes for plated dishes, or creating healthier noodle alternatives, this attachment delivers professional presentation. It works with a wide variety of vegetables from zucchini to potatoes to beets.
4. Fruit/Vegetable Strainer
The strainer attachment separates seeds and skins from fruits and vegetables, creating perfectly smooth purees for sauces, baby food, and beverages. This attachment proves invaluable for making homemade tomato sauce from fresh tomatoes, applesauce from apples, or smooth berry purees without seeds.
The strainer dramatically reduces the effort involved in food preparation while improving consistency. Tasks that once required hand-pressing through fine mesh sieves now happen automatically. Food safety improves since the mixer’s sealed operation prevents contamination, and cleanup is remarkably simple.
5. Citrus Juicer Attachment
The citrus juicer attachment extracts maximum juice from lemons, limes, oranges, and other citrus fruits with minimal effort. Cut your fruit in half, place it on the reaming cone, and the mixer’s power does all the work. You get more juice with less oxidation, which means fresher-tasting juice and longer storage life.
This attachment is particularly useful when you need large quantities of juice for recipes, beverages, or preserving. The automated process prevents hand fatigue that comes from manual juicing, and you achieve consistent results every time.
6. Sausage Stuffer Attachment
The sausage stuffer attachment pairs perfectly with the food grinder, allowing you to prepare fresh sausages at home. After grinding your meat mixture with the appropriate seasonings, simply attach the stuffer cone and feed sausage casings onto it. The mixer’s steady force fills casings evenly without bursting.
This attachment attracts serious sausage enthusiasts who appreciate complete control over ingredients and flavors. Homemade sausages contain no fillers or preservatives, and you can create custom flavor profiles impossible to find commercially. The investment pays for itself quickly for anyone regularly making sausages.
7. Spiralizer Attachment
The spiralizer attachment creates vegetable noodles, curly fries, and ribbon cuts from firm vegetables. The spiral cutting mechanism produces uniform, professional-looking vegetable noodles in seconds. Unlike manual spiralizers, which require significant hand effort and produce inconsistent results, this attachment delivers reliability and consistency.
Health-conscious cooks appreciate how spiralized vegetables provide lower-carb alternatives to pasta. The attachment works beautifully with zucchini, sweet potatoes, carrots, and apples. Presentation improves dramatically when serving spiralized vegetable dishes versus hand-cut alternatives.

Pro Tips for KitchenAid Stand Mixer Attachment Review Pasta Meat
Temperature Matters for Meat Grinding
When using the meat grinder attachment, always keep your meat, grinding plates, and bowl chilled. Place all components in the freezer for at least 30 minutes before grinding—this prevents the meat from warming up during grinding, which compromises texture and food safety. Warm meat smears rather than cuts cleanly, resulting in dense, unpalatable ground meat.
Freeze your grinding plates between batches if grinding large quantities. Temperature consistency proves crucial for optimal results, so never skip this step regardless of how convenient room-temperature grinding might seem.
Pasta Dough Hydration is Critical
Fresh pasta dough requires precise hydration levels—too wet and it sticks, too dry and it tears. Start with the pasta maker attachment using traditional recipes that specify egg-to-flour ratios. These ratios account for the attachment’s specific needs and typically produce superior results compared to experimentally developing your own formulas.
Allow your dough to rest for 15-30 minutes after mixing but before rolling. This resting period allows gluten to develop and makes the dough more pliable. Patience during this phase dramatically improves your final pasta quality.
Invest in High-Quality Casings for Sausage
Natural casings, made from hog intestines, produce superior sausages compared to artificial varieties. They provide that authentic snap when you bite into the sausage and allow better seasoning absorption. Soak casings in warm water for 30 minutes before use to make them pliable and easier to fill.
If working with the sausage stuffer attachment for the first time, ask your butcher to demonstrate proper technique—this small investment of time prevents frustration and waste during your initial attempts.
Keep Vegetables Firm for Sheet Cutting
The vegetable sheet cutter attachment performs best with firm, chilled vegetables. Soft or room-temperature vegetables tear or create uneven slices. Cut vegetables to appropriate lengths for your attachment’s feed chute, and never force vegetables through—let the motor do the work.
For best results with delicate vegetables like zucchini, partially freeze them to maintain firmness during cutting. This prevents mangling and produces those perfect, thin sheets you’re seeking.

Common Mistakes to Avoid
Forcing Attachments Onto the Hub
One of the most common mistakes is forcing attachments onto the power hub without ensuring proper alignment. This damages both the attachment’s coil and the mixer’s hub, resulting in expensive repairs or replacement. Always verify that your attachment is designed for your specific mixer model, and never force components that don’t slide smoothly into place.
Ignoring Capacity Limitations
Each KitchenAid mixer model has maximum capacity recommendations for specific tasks. Overloading your mixer with too much dough, meat, or other ingredients strains the motor and produces subpar results. Always follow the manufacturer’s guidelines regarding batch sizes, and resist the temptation to “just add a little more.”
Running the Mixer at Maximum Speed Continuously
While KitchenAid mixers are powerful, running them at speed 6+ for extended periods generates unnecessary heat and stress on the motor. Use appropriate speeds for each task—generally speeds 1-3 for mixing and kneading, speeds 4-5 for whipping, and avoid speeds above 6 unless specifically directed for particular attachments. This extends your mixer’s lifespan significantly.
Neglecting Proper Cleaning and Maintenance
Food residue left on attachments quickly hardens and becomes difficult to remove. Clean attachments immediately after use with warm soapy water, and dry them completely before storage. Some attachments are dishwasher-safe, but hand washing extends their longevity. Store attachments in a cool, dry location in the protective storage case if provided.
Using Unsuitable Ingredients
Not all ingredients work well with every attachment. For example, very soft fruits with the strainer attachment can result in clogging, and fibrous vegetables may tangle in grinder mechanisms. Understand your attachment’s limitations and prepare ingredients appropriately—removing pits, seeds, and tough fibers as needed before processing.

Key Takeaways
- Invest in Quality Attachments: The initial cost pays for itself through convenience, space savings, and superior results compared to single-purpose appliances.
- Temperature Control is Essential: Keep meat, grinding plates, and mixing bowls appropriately chilled for optimal KitchenAid stand mixer attachment review pasta meat results.
- Master One Attachment at a Time: Become proficient with each attachment before expanding your collection to prevent frustration and disappointing results.
- Follow Manufacturer Guidelines: Adhering to capacity recommendations, speed settings, and cleaning instructions ensures your mixer and attachments last for decades.
- Prepare Ingredients Properly: Success with any attachment depends on appropriate ingredient preparation, including proper sizing, temperature, and removing incompatible elements.
Frequently Asked Questions about KitchenAid Stand Mixer Attachment Review Pasta Meat
Q: What is the best KitchenAid stand mixer attachment review pasta meat for beginners?
A: Beginners should start with the basic flat mixing paddle, dough hook, and wire whip attachments that come with most KitchenAid stand mixers. These attachments handle the most common kitchen tasks and are straightforward to use. Once comfortable with these, the pasta maker attachment and food grinder attachment represent excellent next purchases for expanding capabilities. Both dramatically improve results for their respective tasks and work reliably once you understand basic technique.
Q: How do I use KitchenAid stand mixer attachment review pasta meat for grinding meat safely?
A: Start by ensuring all components—grinding plates, feed tube, bowl, and the meat itself—are properly chilled by freezing for at least 30 minutes. Always work with high-quality, fresh meat that’s appropriate for grinding. Cut meat into chunks that fit your attachment’s feed chute, and never push meat through with excessive force. Let the motor do the work, and if meat doesn’t feed smoothly, stop and reassess your setup. Process meat in batches rather than one massive batch, and refrigerate ground meat immediately after completing the grinding process.
Q: Can I use KitchenAid stand mixer attachment review pasta meat attachments with all mixer models?
A: Most modern KitchenAid stand mixer attachments are compatible with common models, but older machines or specialty models may have limited attachment availability. Always verify compatibility with your specific mixer model before purchasing. The KitchenAid website provides comprehensive compatibility charts, and contacting customer service can answer questions about older or specialty equipment.
Q: How do I clean and maintain KitchenAid stand mixer attachment review pasta meat equipment?
A: Clean attachments immediately after use with warm soapy water and a soft sponge or cloth. Many attachments are dishwasher-safe but hand washing extends longevity. Dry completely before storing in a cool, dry location. For attachments with multiple components, disassemble them completely during cleaning to remove any trapped food particles. Never soak attachments for extended periods, as this can damage seals or cause corrosion.
Q: Which KitchenAid stand mixer attachment review pasta meat options offer the best value for money?
A: The pasta maker attachment and food grinder attachment provide excellent value by eliminating the need to purchase expensive dedicated equipment. Both typically pay for themselves within a few uses compared to buying pasta from restaurants or having butchers grind meat. The vegetable sheet cutter attachment also provides outstanding value for anyone regularly preparing fresh vegetables or creating healthy noodle alternatives.
Conclusion
A comprehensive KitchenAid stand mixer attachment review pasta meat analysis demonstrates why these versatile additions have become essential for home cooks and professional chefs alike. From creating restaurant-quality fresh pasta to grinding perfectly textured meat blends, these attachments expand your mixer’s capabilities exponentially. By understanding each attachment’s specific function, following proper techniques, and maintaining your equipment correctly, you’ll enjoy years of reliable, professional results. Invest in the attachments that align with your cooking style and preferences, master them one at a time, and watch your culinary skills reach new heights. Start with the pasta maker or meat grinder attachment today and experience the transformation these powerful tools bring to your kitchen.
Recommended Products on Amazon
As an Amazon Associate I earn from qualifying purchases.