How to use an air fryer for the first time
Air Fryer First Time Beginner Guide: Essential Tips for Using Your Rack and Getting Perfect Results
Getting your air fryer first time setup right can make the difference between perfectly crispy results and disappointing meals. As someone who’s tested dozens of air fryers and helped countless beginners master this revolutionary cooking method, I understand the excitement and uncertainty that comes with unboxing your first air fryer. This comprehensive beginner guide will walk you through everything you need to know about using your air fryer, from initial setup to mastering the rack system and achieving restaurant-quality results at home.
Air fryers have transformed home cooking, with over 40% of American households now owning one according to recent market research. These countertop convection ovens use rapid air circulation technology to create crispy, golden foods with up to 85% less oil than traditional frying methods. Whether you’ve invested in a compact single-serve model or a large capacity unit with multiple racks, understanding the fundamentals will ensure you get the most out of your investment. This tutorial covers essential tips for beginners, safety protocols, maintenance requirements, and troubleshooting common issues that first-time users encounter.
Table of Contents
- Unboxing and Initial Setup
- Understanding Your Air Fryer Components and Rack System
- First Use Preparation and Safety Guidelines
- Essential Cooking Tips for Beginners
- Maintenance and Troubleshooting
- Frequently Asked Questions
- Conclusion
Unboxing and Initial Setup
When you first time open your air fryer box, you’ll typically find the main unit, removable basket or rack system, instruction manual, and often a starter recipe booklet. Beginner users should carefully inspect all components for shipping damage before proceeding with setup. Remove all packaging materials, including any protective films or cardboard inserts that manufacturers place inside the cooking chamber.
The initial setup process begins with finding the perfect location for your air fryer. Choose a stable, level surface with at least 6 inches of clearance on all sides to ensure proper ventilation. Kitchen countertops work best, but avoid placing your unit directly under cabinets or near heat-sensitive materials. The powerful fan system requires adequate airflow to function efficiently and safely.
Before your first time cooking, thoroughly wash all removable components with warm, soapy water. This removes any manufacturing residues or protective coatings that could affect food taste. The main heating element and interior chamber should be wiped down with a damp cloth – never submerge the main unit in water. Popular models like the Ninja Foodi 8-Quart ($149-179) or Cosori Pro LE 5-Quart ($89-119) come with detailed cleaning instructions specific to their rack configurations.
Most air fryers require a “break-in” period where you run the empty unit for 10-15 minutes at maximum temperature. This process eliminates any residual manufacturing odors and ensures all components are properly heated and ready for cooking. During this initial run, you might notice slight smoke or chemical smells – this is completely normal and will dissipate after the first few uses.
Understanding Your Air Fryer Components and Rack System
Modern air fryers come in two primary designs: basket-style units and oven-style models with rack systems. Beginner users often find basket-style models like the Philips Airfryer XXL ($249-299) more intuitive, while multi-level rack systems in units like the Instant Omni Plus ($199-249) offer greater cooking versatility for families.
The rack system is crucial for maximizing your air fryer’s potential. Single-level units typically include a perforated basket or tray that allows hot air to circulate around food. Multi-level systems feature stackable racks that enable simultaneous cooking of different foods. Understanding your specific rack configuration helps optimize cooking results and prevents common beginner mistakes like overcrowding or improper food placement.
Temperature and timer controls vary significantly between models. Digital displays offer precise control, typically ranging from 180°F to 400°F with 5-degree increments. Analog controls are simpler but less precise. Tips for first time users include starting with manufacturer-recommended temperatures and times, then adjusting based on personal preferences and specific food requirements.
The fan and heating element work together to create the convection effect that makes air frying so effective. Most units feature heating elements located above the cooking chamber, with powerful fans (typically 1400-1700 watts) circulating air at speeds up to 15 mph. This rapid air movement creates the Maillard reaction responsible for that coveted crispy exterior while maintaining moisture inside foods.
Safety features in quality air fryers include automatic shut-off when the basket or rack is removed, overheat protection, and cool-touch handles. Beginner guide recommendations emphasize familiarizing yourself with these features before cooking your first meal, as they prevent accidents and protect your investment.

First Use Preparation and Safety Guidelines
First time air fryer users must prioritize safety and proper preparation to ensure successful cooking experiences. Start by reading your specific model’s instruction manual thoroughly – each manufacturer includes unique tips and warnings that generic guides might miss. Safety protocols include never operating the unit without the basket or rack properly installed, avoiding overcrowding that restricts airflow, and maintaining proper clearances around the unit.
Preheating your air fryer is essential for optimal results, though many beginners skip this crucial step. Most models require 3-5 minutes of preheating, similar to conventional ovens. The Breville Smart Oven Air Fryer ($399-449) includes automatic preheating functions, while budget models like the BLACK+DECKER Purify ($79-99) require manual preheating. Proper preheating ensures even cooking and helps achieve that signature crispy texture.
Food preparation tips for first time users include patting foods dry before cooking, as excess moisture creates steam that prevents crisping. Light oil application – using just 1-2 teaspoons compared to cups required for deep frying – enhances browning and flavor. Oil sprayers or brush application work better than pouring, which can pool in the basket and create uneven results.
Understanding capacity limits prevents disappointing results and potential safety issues. Beginner mistakes include filling baskets beyond 75% capacity, which restricts air circulation and leads to uneven cooking. Single-layer arrangement works best for most foods, with the rack system allowing multiple layers only when foods don’t require turning or shaking during cooking.
Temperature guidelines for first time users start with manufacturer recommendations, then adjust based on results. Frozen foods typically require 25-50°F higher temperatures than fresh equivalents. Delicate items like fish or pastries need lower temperatures (300-325°F), while heartier vegetables and meats perform well at higher settings (375-400°F). Keeping a cooking log during your first few weeks helps identify optimal settings for your favorite foods.
Essential Cooking Tips for Beginners
Mastering basic air fryer techniques transforms first time users into confident home cooks. The shake-and-flip method represents the most crucial beginner skill – foods like fries, vegetables, and chicken pieces require redistribution halfway through cooking for even browning. Set timer reminders for these intervals, typically at the 50% cooking mark.
Rack utilization strategies maximize your air fryer’s potential. Multi-level cooking requires understanding how different foods cook at varying rates. Start heartier items like potatoes on lower racks first, then add quicker-cooking items like asparagus or fish on upper levels. This technique works particularly well in larger units like the Cuisinart TOA-65 ($299-349) with its extensive rack system.
Seasoning and flavoring tips help beginners create restaurant-quality results. Dry seasonings adhere better when applied after light oil coating. Marinades should be patted partially dry to prevent excess moisture. Fresh herbs work best when added during the final few minutes to prevent burning. Garlic powder and onion powder resist burning better than fresh versions at high temperatures.
Cooking time adjustments require understanding that air fryers cook 20-25% faster than conventional ovens. First time users should start checking foods at 75% of recommended cooking times, then extend as needed. Dense vegetables like carrots or sweet potatoes might need additional time, while thin items like bacon or fish fillets cook very quickly.
Achieving optimal texture requires matching cooking methods to food types. Foods with natural moisture like tomatoes or mushrooms benefit from higher temperatures to drive off excess water quickly. Breaded items need moderate temperatures to cook through without burning the coating. Fatty meats like salmon or duck render better at lower temperatures, while lean proteins need careful monitoring to prevent drying out.

Maintenance and Troubleshooting
Regular maintenance ensures your air fryer delivers consistent results and extends its lifespan significantly. First time users should establish cleaning routines immediately, as built-up grease and food particles affect performance and can create safety hazards. Daily cleaning involves washing removable components like baskets and racks in warm, soapy water after each use.
Weekly deep cleaning includes wiping down the interior chamber, cleaning the heating element (when cool), and checking air vents for obstructions. Models with removable racks like the GoWISE USA 8-Quart ($89-119) make this process easier than fixed-basket designs. Use baking soda paste for stubborn grease buildup, but avoid abrasive cleaners that can damage non-stick coatings.
Common beginner troubleshooting issues include uneven cooking, excessive smoke, and poor crisping results. Uneven cooking usually stems from overcrowding or inadequate shaking/flipping. Smoke often indicates excess oil or food particles burning on the heating element. Poor crisping results from too much moisture, insufficient preheating, or overcrowded racks.
Component replacement knowledge helps maintain optimal performance. Non-stick coatings on baskets and racks typically last 2-3 years with proper care. Replacement parts for popular models like the Ninja Foodi series ($15-45 for baskets) are readily available, while obscure brands might have limited part availability.
Performance optimization tips include rotating racks position for even heating, using parchment paper designed for air fryers (never regular parchment above 400°F), and understanding how altitude affects cooking times. High-altitude locations may require temperature increases of 15-25°F and extended cooking times due to lower air pressure affecting heat transfer efficiency.
Frequently Asked Questions
What should I cook first in my new air fryer as a complete beginner?
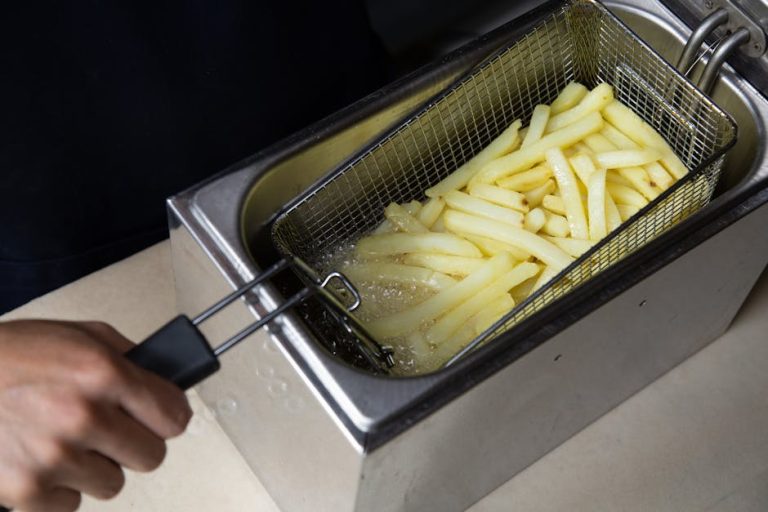
First time air fryer users should start with simple, forgiving foods that showcase the appliance’s strengths. Frozen French fries represent the perfect starter recipe because they’re pre-seasoned, require minimal preparation, and demonstrate the air fryer’s ability to create crispy textures. Cook 1-2 cups of frozen fries at 380°F for 12-15 minutes, shaking the basket every 5 minutes. This beginner-friendly recipe helps you understand your specific model’s cooking patterns, timer functions, and rack or basket system while building confidence for more complex dishes.
How do I prevent food from sticking to the air fryer basket or rack?
Preventing sticking requires proper preparation and technique understanding. Light oil application using a spray bottle or brush creates a barrier between food and surfaces. Parchment paper designed specifically for air fryers (perforated versions) works excellently, but never use regular parchment paper above 400°F as it can burn. For protein-rich foods like chicken or fish, ensure the cooking surface reaches proper temperature before adding food – this creates immediate searing that prevents sticking. Rack systems in larger units often have better non-stick coatings than budget basket models, making them more beginner-friendly for delicate foods.
Can I use aluminum foil in my air fryer, and what are the safety considerations?
Aluminum foil is safe in air fryers when used correctly, but beginner users must understand proper techniques. Never cover the entire basket or rack with foil, as this blocks essential airflow that makes air frying effective. Create small foil boats or use perforated foil to contain messy foods while maintaining air circulation. Ensure foil pieces are weighted down with food to prevent them from blowing around and potentially contacting the heating element. Heavy-duty foil works better than thin versions, and avoid using foil with acidic foods like tomatoes or citrus, which can cause metallic taste transfer and foil degradation.
How full can I fill my air fryer basket or rack system?
Proper capacity management directly impacts cooking success. Fill baskets to no more than 75% capacity, allowing space for air circulation around all food pieces. Single-layer arrangement works best for most foods, with pieces not touching each other. Multi-level rack systems allow higher capacity, but each level should follow the same 75% rule. Overcrowding leads to uneven cooking, increased cooking times, and poor crisping results. For large batches, cook in multiple smaller batches rather than overloading – this actually saves time because properly spaced food cooks more efficiently than overcrowded batches that require extended cooking times and multiple redistributions.
What temperatures and cooking times should beginners start with for common foods?
Beginner guide temperature recommendations provide starting points for experimentation. Vegetables cook well at 375°F for 8-12 minutes depending on thickness – asparagus needs 6-8 minutes while Brussels sprouts require 12-15 minutes. Chicken pieces work best at 380°F for 12-18 minutes, with internal temperature reaching 165°F for safety. Fish fillets need gentler 350°F heat for 6-10 minutes to prevent drying. Frozen foods typically require temperatures 25-50°F higher than fresh equivalents. Always start checking doneness at 75% of estimated cooking time, as air fryers cook 20-25% faster than conventional ovens. Keep a cooking log during your first month to identify optimal tips and settings for your favorite foods and specific air fryer model.
Conclusion
Mastering your air fryer first time experience sets the foundation for years of healthy, convenient cooking. This comprehensive beginner guide has covered everything from initial setup and safety protocols to advanced rack system utilization and troubleshooting tips. Remember that becoming proficient with your air fryer requires practice and experimentation – each model has unique characteristics that you’ll discover through regular use.
The key to air fryer success lies in understanding the fundamental principles: proper preheating, appropriate food spacing, regular shaking or flipping, and matching temperatures to food types. Whether you’re using a simple basket-style unit or a sophisticated multi-rack system, these core concepts remain constant. Start with simple recipes, gradually building complexity as your confidence grows.
Ready to start your air fryer journey? Begin with the frozen French fries test recipe mentioned in our FAQ section, then progress to fresh vegetables and simple proteins. Document your results, adjust settings based on your preferences, and don’t be afraid to experiment. Your air fryer will quickly become one of your most valuable kitchen appliances, delivering crispy, delicious meals with minimal oil and maximum convenience.